Authorization
The authorization process verifies whether you have permission to access the data you want from the server. When you send a request, you often have to include parameters to ensure the request has permission to access and return the data you want. Postman provides authorization types that make it easy for you to handle authentication protocols in Postman native apps.
When you select “Authorization” in the request builder, you see the TYPE drop down menu.
- Inherit auth from parent
- No Auth
- Bearer Token
- Basic auth
- Digest Auth
- OAuth 1.0
- OAuth 2.0
- Hawk Authentication
- AWS Signature
- NTLM Authentication [Beta]
Note: NTLM and Bearer token are only available in Postman native apps. All other authorization types are available in Postman native apps and the Chrome app. Note that the Postman Chrome app is being deprecated.

You can use environment, collection, or global variables with all authorization types. In addition to using these in the Postman app, you can also use these authorization types with Newman or Postman monitors.
Postman does not save header data and query parameters to prevent sensitive data exposure, such as API keys, to the public.
If you want to inspect the authorization headers and parameters that Postman generates, click the Preview Request button.

Note: You can inspect a raw dump of the entire request in the Postman console after you send it.
Inherit auth from parent
Adding authorization to a collection or folder
Suppose you add a folder to a collection. Under the Authorization tab, the default authorization type is set to “Inherit auth from parent”.
The “Inherit auth from parent” setting indicates that every request in this folder by default uses the authorization type from the parent. In this example, the collection is using “No Auth”, so the folder uses “No Auth”, meaning all requests in that folder will use “No Auth” .

What if you want to leave the parent collection authorization type as “No Auth”, but update this specific folder’s authorization helper? You can edit the folder details, select “Basic Auth” from the TYPE dropdown, and input your credentials. As a result, every request in this folder relies on “Basic Auth” while the rest of the requests in the parent collection still do not use any authorization.

Similarly, if you want to update the authorization for a single request in this folder, you can simply select a different authorization type for that request.
If you have a group of requests that all require the same authorization, you can define the authorization for all requests in a collection or folder, or simply for every request individually. If you create a new collection or folder, every subsequent request in the parent element inherits the authorization definition, unless the user explicitly selects another type.
To update the collection or folder authorization, click on the ellipses (…) next to the collection or folder name, and select “Edit” to open the modal. Select the Authorization tab to select an authorization type from the TYPE dropdown. You can also add collection authorization when initially creating the collection.

For example, if you create a collection with “Basic Auth”, every request within the collection will use the same authorization helper. If you want a specific request in the collection to use a different authorization, or no authorization at all, use the TYPE dropdown under the Authorization tab to define the authorization helper for the specific request.
No Auth
By default “No Auth” appears first on the drop down menu list. Use “No Auth” when you don’t need an authorization parameter to send a request.
Bearer Token
A bearer token is a security token. Any user with a bearer token can use it to access data resources without using a cryptographic key.
To use a bearer token:
- In the Authorization tab, select “Bearer Token” from the TYPE drop down menu.
- To set the authorization parameters for a request, enter the value of the token.
- Click the Send button.

Basic Auth
Basic Auth is an authorization type that requires a verified username and password to access a data resource.
To use Basic Auth:
- In the Authorization tab, select “Basic Auth” from the TYPE drop down menu.
- To set the authorization parameters for a request, enter your username and password.
- Click the Send button.

Digest Auth
In a digest authentication flow, the client sends a request to a server, which sends back nonce and realm values for the client to authenticate. The client sends back a hashed username and password with the nonce and realm. The server then sends back the requested data.
By default, Postman extracts values from the response. If you do not want to extract those values, you have two options:
- Enter your own values in the advanced section for selected fields, or
- Select the “Yes, disable retrying the request” checkbox to skip retrying the request.
To use digest auth:
- In the Authorization tab, select “Digest Auth” from the TYPE drop down menu.
- To set the authorization parameters for a request, enter your username and password. (You can also set advanced digest auth parameters.)
- Click the Send button.
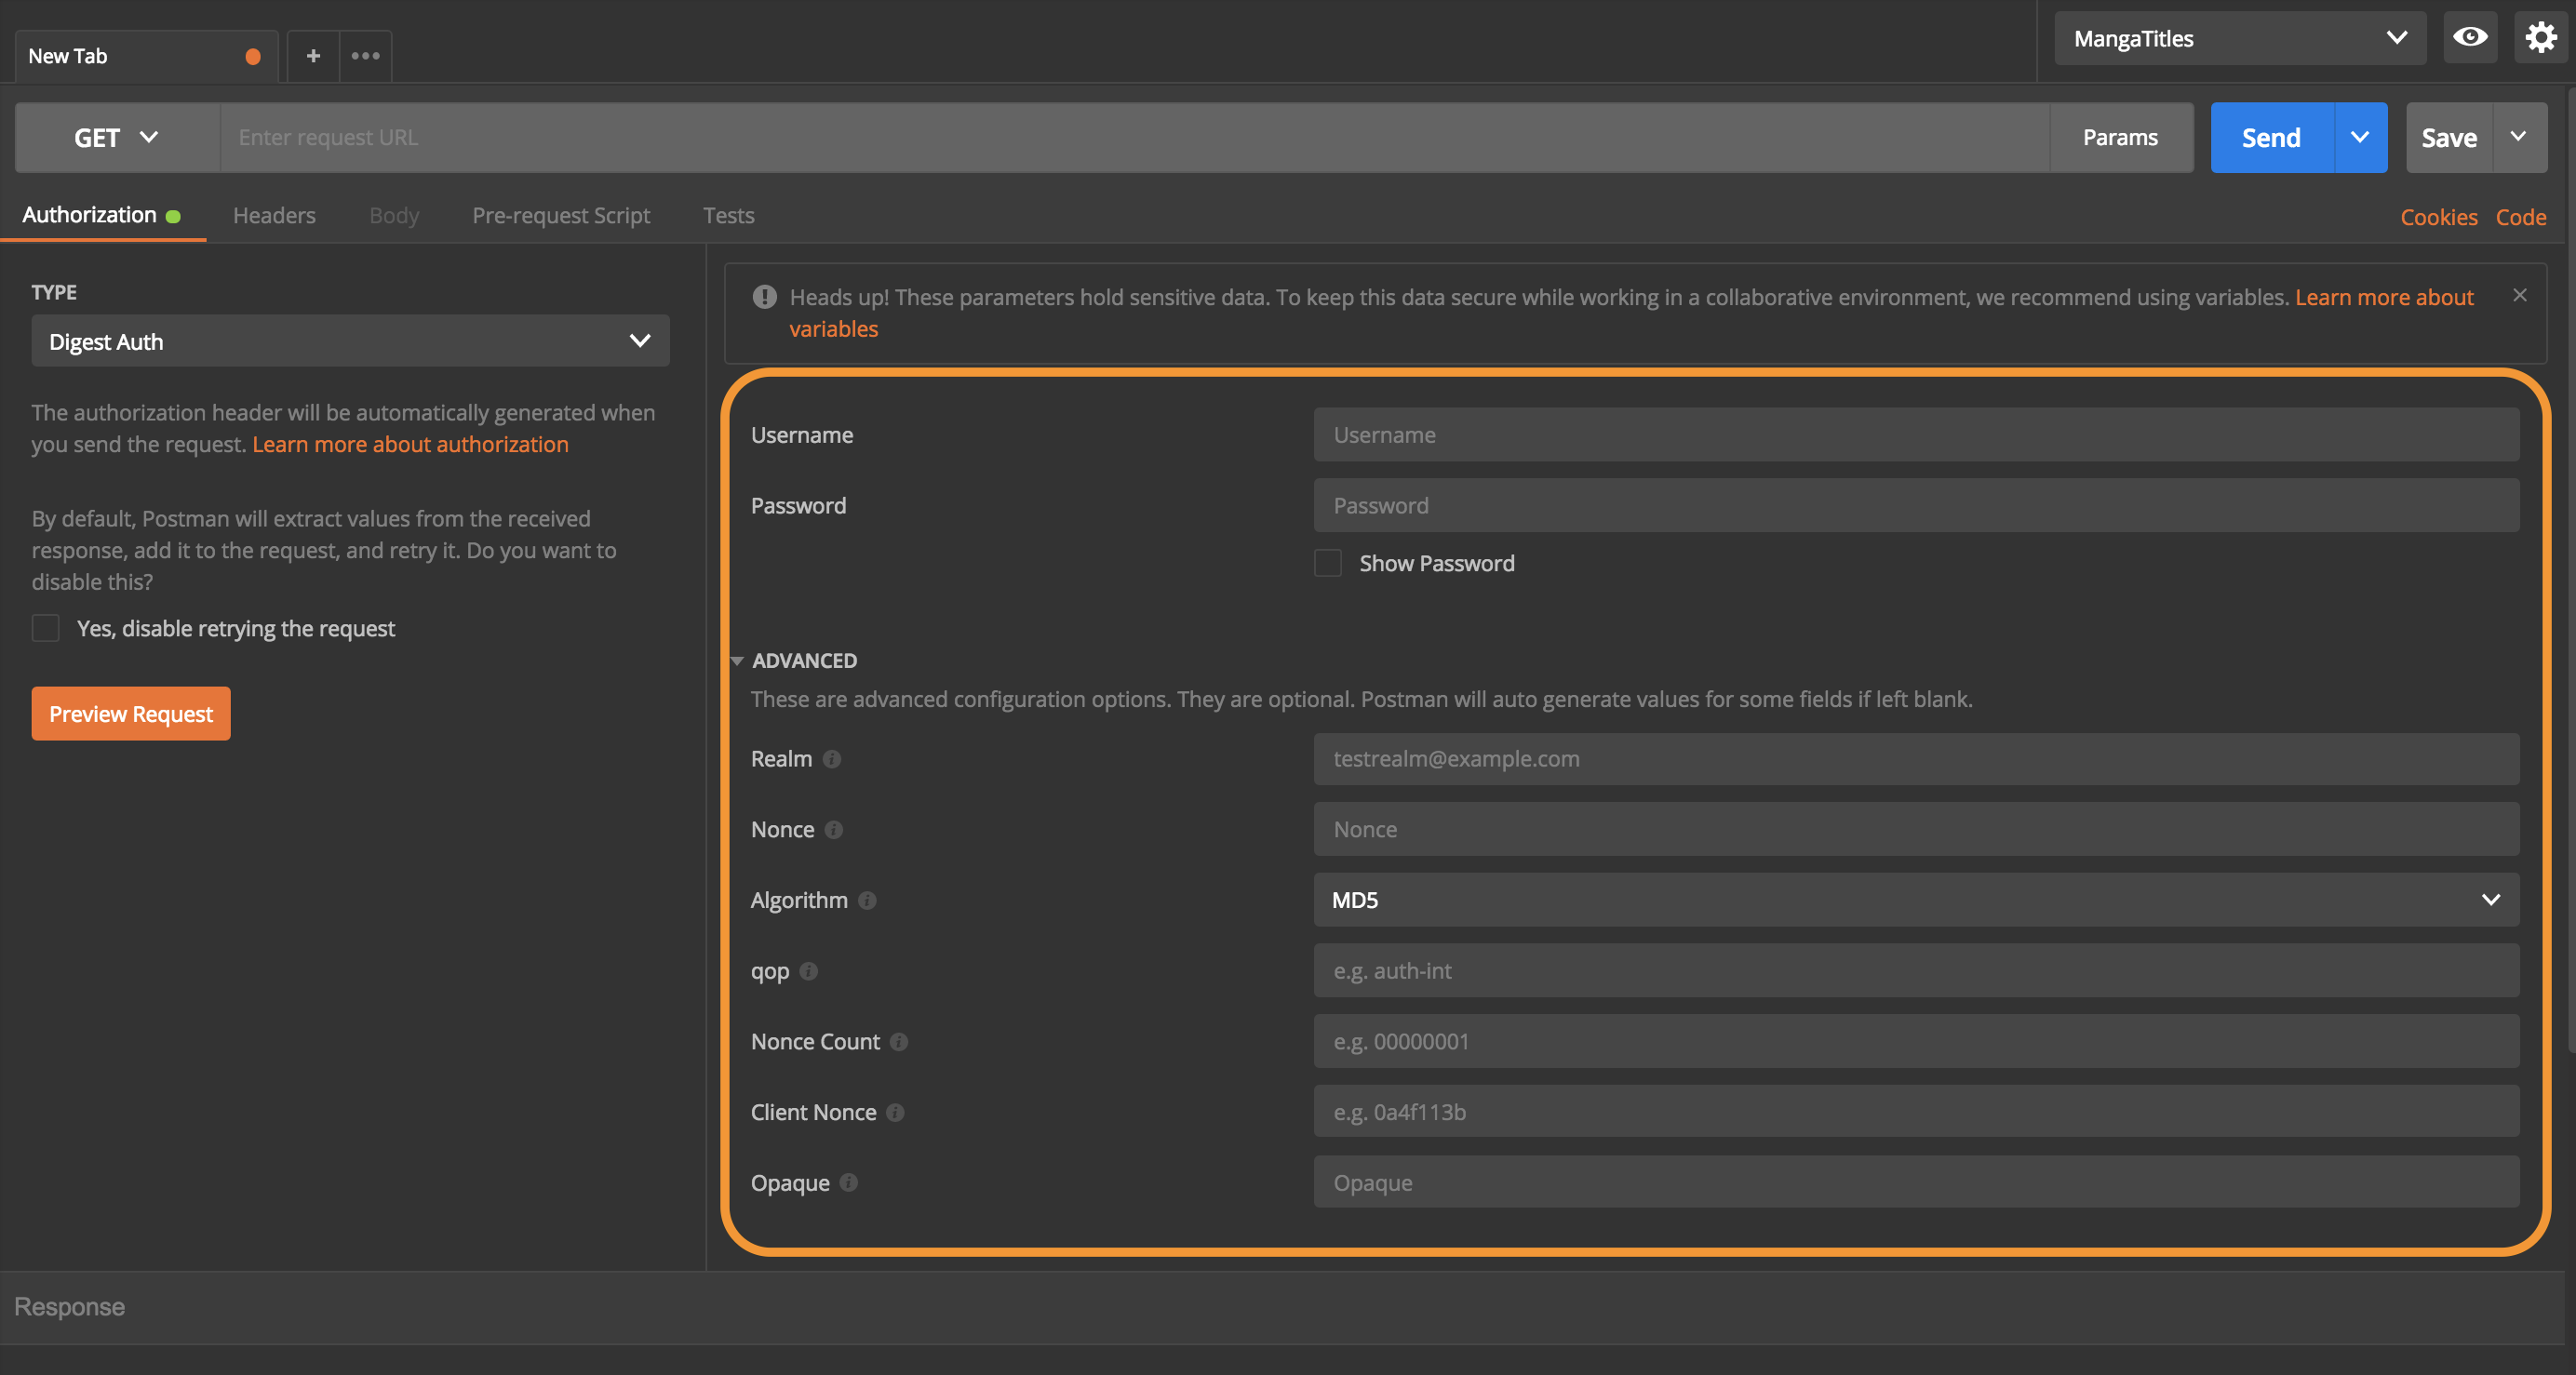
This table describes the advanced parameters for Digest Auth. Advanced configuration settings are optional. Postman automatically generates values for some fields if left blank.
| Advanced Parameters | Description |
|---|---|
| Realm | A string specified by the server in the www-Authenticate response header. |
| Nonce | A unique string specified by the server in the www-Authenticate response header. |
| Algorithm | A string that indicates a pair of algorithms used to produce the digest and a checksum. |
| qop | The quality of protection applied to the message. The value must be one of the alternatives specified by the server in the www-Authenticate response header. |
| Nonce Count | The hexadecimal count of the number of requests (including the current request) that the client has sent with the nonce value in this request. The count must be specified if a qop directive is sent, and must not be specified if the server did not send a qop directive in the www-Authenticate response header. Postman always sends 00000001 as the nonce count. |
| Client Nonce | An opaque quoted string valued provided by the client and used by both client and server to avoid chosen plaintext attacks to provide mutual authentication and to provide some message integrity protection. The count must be specified if a qop directive is sent, and must not be specified if the server did not send a qop directive in the www-Authenticate response header. |
| Opaque | This is a string of data specified by the server in the www-Authenticate response header and should be used here unchanged with URLs in the same protection space. We recommend this string be base64 encoded data. |
OAuth 1.0
OAuth 1.0 is an authorization type that enables you to approve an application that contacts another application for you without exposing your password.
To use the OAuth 1.0 authorization:
- In the Authorization tab, select “OAuth 1.0” from the TYPE drop down menu.
- From the “Add authorization data to” drop down menu, select either “Request Body/Request URL” or “Request Headers”.
When you select “Request Body/Request URL”, Postman checks if the request method is POST or PUT, and if the request body type is x-www-form-urlencoded. If so, Postman adds authorization parameters to the request body. For all other cases, it adds authorization parameters to the URL.
- To set the authorization parameters for a request, enter the “Consumer Key”, “Consumer Secret”, “Access Token”, and “Token Secret”. You can also set advanced digest OAuth 1.0 parameters.

This table describes the parameters for OAuth 1.0 authorization.
| Parameters | Description |
|---|---|
| Consumer Key | A consumer’s value that identifies itself to the service provider. |
| Consumer Secret | A consumer’s secret that establishes ownership of the consumer key. |
| Access Token | An object that contains the security identity. |
| Advanced Parameters | |
| Signature Method | A consumer’s secret that establishes ownership of a given token. |
| Time Stamp | The timestamp the server uses to prevent replay attacks outside the time window. |
| Nonce | A unique string specified by the server in the www-Authenticate response header. |
| Version | The 1.0 version of the OAuth authentication protocol. |
| Realm | A string specified by the server in the www-Authenticate response header. |
Note: Some implementations of OAuth 1.0 require empty parameters to be added to the signature. You can select “Add empty parameters to signature” to add empty parameters.
OAuth 2.0
OAuth 2.0 is an authorization type that enables you to approve an application that contacts another application for you without exposing your password.
To use the OAuth 2.0 authorization:
- In the Authorization tab, select “OAuth 2.0” from the TYPE drop down menu.
- From the “Add authorization data to” drop down menu, select either “Request URL” or “Request Headers”.
- To set the authorization parameters for a request, you have three options:
- Click the Get New Access Token button. The GET NEW ACCESS TOKEN screen appears. Enter the appropriate values, click the Request Token button to populate the “Access Token” field, and then click the Send button.
- In the “Access Token” field, enter a token, or an environment defined variable, and click the Send button.
- In the “Available Tokens” drop down menu, select an existing token and click the Send button.

This table describes the parameters in the GET NEW ACCESS TOKEN screen.
| Parameters | Description |
|---|---|
| Token Name | The name of the token. |
| Grant Type | A drop down menu where you can specify one of the following grant types: “Authorization Code”, “Implicit”, “Password Credentials”, and “Client Credentials”. |
| Callback URL | The Application’s callback URL that’s registered with the server. If not provided, Postman uses a default empty URL and extracts the code or access token from it. |
| Auth URL | The endpoint for authorization server, which retrieves the authorization code. |
| Access Token URL | The endpoint for the resource server, which exchanges the authorization code for an access token. |
| Client ID | The client identifier given to the client during the Application registration process. |
| Client Secret | The client secret given to the client during the Application registration process. |
| Scope | The scope of the access request, which might have multiple space-separated values. |
| State | An opaque value that prevents cross-site request forgery. |
| Client Authentication | A drop down menu where you can either send a Basic Auth request in the header, or send client credentials in the request body. Note: After upgrading to a new version, change the value in this drop down menu to avoid problems with client authentication. |

You can click “Manage Tokens” in the list to view more details about each token and delete any one of them. If there are no tokens in the list, the user needs to click the Get New Access Token button to generate a token that Postman adds to the list.

Note: Deleting a token does not revoke the access token. Only the server that issues the token can revoke it.
Hawk authentication
Hawk authentication enables you to make authenticated requests with partial cryptographic verification of the request.
To use Hawk authentication:
- In the Authorization tab, select “Hawk Authentication” from the TYPE drop down menu.
- To set the authorization parameters for a request, enter the “Hawk Auth ID”, “Hawk Auth Key”, and “Algorithm values”. You can also set advanced Hawk authentication parameters.
- Click the Send button.

This table describes the parameters for Hawk Authentication.
| Parameters | Description |
|---|---|
| Hawk Auth ID | The authentication ID value. |
| Hawk Auth Key | The authentication key value. |
| Algorithm | The hash algorithm used to create the message authentication code (MAC). |
This table describes the advanced parameters for Hawk Authentication. Advanced configuration settings are optional. Postman automatically generates values for some fields if left blank.
| Advanced Parameters | Description |
|---|---|
| User | The user name. |
| Nonce | A random string generated from the client. |
| ext | Any application-specific information to be sent with the request. |
| app | The binding between credentials and the application in a way that prevents an attacker from tricking an application to use credentials issued to someone else. |
| dlg | The ID of the application of which the credentials were directly issued. |
| Timestamp | The timestamp the server uses to prevent replay attacks outside the time window. |
Note: Advanced configuration settings are optional. Postman auto generates values for some fields if left blank.
Amazon Web Services (AWS) authentication
AWS is the authorization workflow for Amazon Work Services requests. AWS users must use a custom HTTP scheme based on a keyed-HMAC (Hash Message Authentication Code) for authentication. Postman supports this scheme.
Read more about the AWS Signature on AWS documentation:
To use AWS authentication:
- In the Authorization tab, select “AWS Signature” from the TYPE drop down menu.
- To set the authorization parameters for a request, enter the values for the access and secret keys. You can also set advanced AWS authentication parameters.
- Click the Send button.

This table describes the advanced parameters for AWS Authentication. Advanced configuration settings are optional. Postman automatically generates values for some fields if left blank.
| Advanced Parameters | Description |
|---|---|
| AWS Region | The region receiving the request. (Default region is us-east-1.) |
| Service Name | The service receiving the request. |
| Session Token | Required only when using temporary security credentials. |
NTLM authentication
Windows Challenge/Response (NTLM) is the authorization flow for the Windows operating system and for stand-alone systems. By default, Postman extracts values from the received response, adds it to the request, and retries it. Postman gives you the option to disable this default behavior.
To use NTLM authentication:
- In the Authorization tab, select “NTLM Authentication” from the TYPE drop down menu.
- To set the authorization parameters for a request, enter the username and password. You can also set advanced NTLM authentication parameters.
- Click the Send button.
This table describes the advanced parameters for NTLM Authentication. Advanced configuration settings are optional. Postman automatically generates values for some fields if left blank.
| Advanced Parameters | Description |
|---|---|
| Domain | The domain or host to authenticate against. |
| Workstation | The hostname of the PC. |
