Setting up a mock server
Simulating a back-end with Postman’s mock servers
Delays on the front- or back-end make it difficult for dependent teams to complete their work efficiently. Postman’s mock servers can alleviate those delays in the development process.
Front-end developers can create a mock server to simulate each endpoint and its corresponding environment in a Postman Collection, before sending the actual request. Developers can view potential responses, without spinning up a back end.
Creating a mock example during the earliest phase of API development fosters clear communication among team members and aligns their expectations. As a result, all teams in the development process can work in parallel; and dependent teams experience fewer delays.
Setting up a mock server
You can create a mock in several ways:
- New button
- Launch screen
- Postman app
- Postman API
Mocks are accessible to the public by default. If you create a mock and specify that it is only to be available privately, Postman Pro and Enterprise users can share the underlying collection with the team or specific team members, and provide permissions to edit or view.
Note: This topic only covers how to create a mock with the New button and the Launch screen. To learn how to create a mock with the Postman app or the Postman API, click its link for detailed information.
New button
- In the header toolbar, click the New button.

The Create New tab appears.
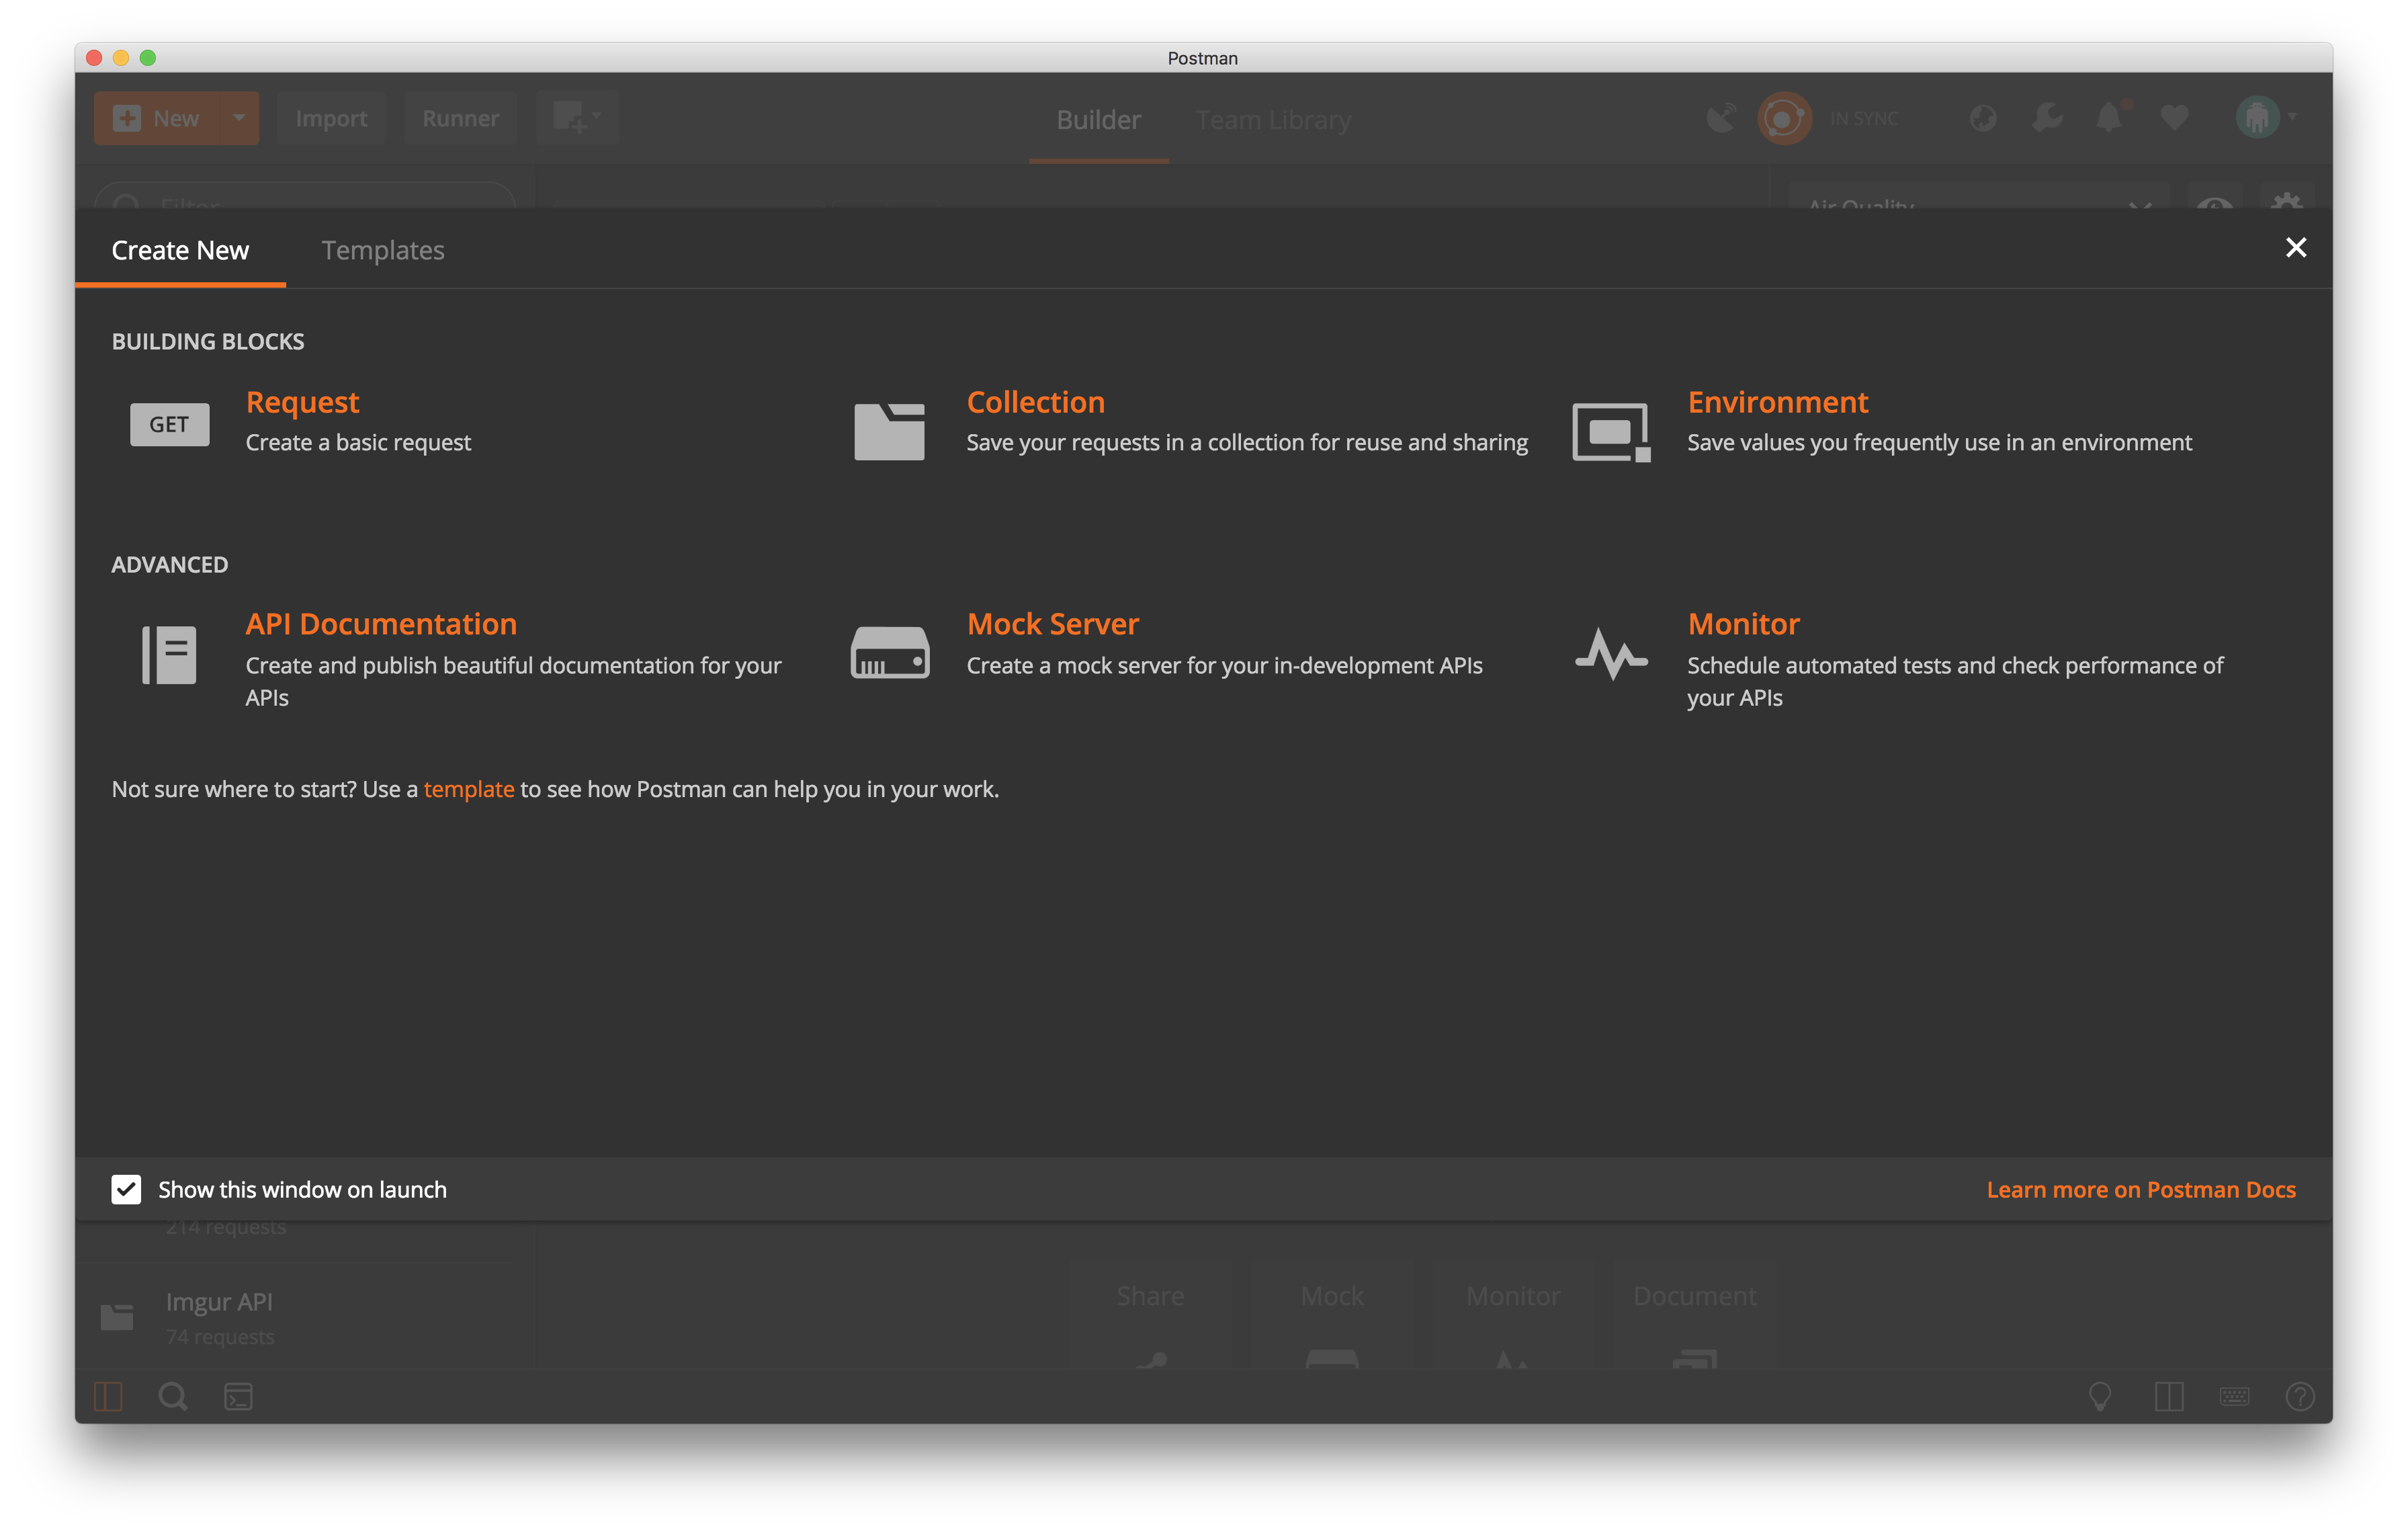
Note: At the bottom, you can select “Show this window at launch” to indicate whether you want the Create New tab to display each time you open Postman.
- Click "Mock Server".
- Select if you want to mock a new API or an existing or team collection. If you create a new API to mock, you must select a request method and enter the request path, response code, and response body. If you use an existing or team collection to mock, you must select a collection from a list of existing or team collections.

- After you select or create the request you want to mock, click the Next button.
- In the Configure mock server tab, you must:
- Enter the name of the mock
- Select an environment (optional).
- Indicate if you want to make this mock server private
Note: The number of calls made to mock servers might be limited by your Postman account. Check your usage limits.

- Click the Create button.
In the Next steps tab, see a list of suggested next steps to maximize the effectiveness of your mock server.
Launch screen
The Create New tab appears by default when you launch Postman.
- Open the Postman app.
- In the Create New tab, click “Mock Server”.
- Follow steps 3-6 in the previous New button section.
Note: At the bottom, you can select “Show this window at launch” to indicate whether you want the Create New tab to display each time you open Postman.
Using HTTP access control (CORS) for a mock
In addition to using the Postman app to make requests to mock endpoints, you also can make those requests in a browser.
A web browser makes a cross-origin HTTP request when it requests a resource from a domain, protocol, or port that’s different from its own.
For security reasons, cross-origin resource sharing (CORS) is a standard that defines a way in which a browser and server can interact securely. In this case, we are referring to how a web browser interacts with the mock endpoints hosted on the Postman server.
CORS is enabled for Postman mock servers. As a result, you can stub your web apps with mocked data using the mock endpoints. So development or production web apps can make requests to the Postman mock endpoint you just created and receive an example response.
Using free mock server calls with your Postman account
Your Postman account gives you a limited number of free mock server calls per month.
You can check your usage limits in the Postman API or in the account usage page.